Getting Started
This page takes you from an Ignition Gateway without OpenBridge to a running OpenBridge project:
- Install the module on the Gateway.
- Get the demo project. On Ignition 8.3 the module adds it for you.
- Use the demo project as a template for your own project.
The Gateway pages were reorganised in Ignition 8.3, so where the steps differ they are given for both 8.3 and 8.1. On Ignition 2027, follow the 8.3 steps.
Before You Start
Section titled “Before You Start”You need:
- An Ignition Gateway, version 8.3.0 or later or 8.1.21 or later, with the Perspective module installed. The demo project requires 8.3 or later. A module for the Ignition 2027 beta is also available (see Download).
- A Gateway user who is allowed to change the Gateway configuration.
- The Ignition Designer, to open the project after importing it.
Install the Module
Section titled “Install the Module”Download
Section titled “Download”Download the module from openstudio.no/downloads. There is one file for each Ignition version:
| Ignition version | Button on the download page | File |
|---|---|---|
| 2027 (beta) | — | ObComponents-<version>-2027.modl |
| 8.3.0 or later | Download for 8.3 | ObComponents-<version>-8.3.modl |
| 8.1.21 or later | Download for 8.1 | ObComponents-<version>-8.1.modl |
Pick the file that matches your Gateway. A module built for one Ignition version does not start on another: it is listed as Faulted after installing.
Install
Section titled “Install”Installing a module does not interrupt running Perspective sessions, but every open Designer has to be restarted afterwards. On a production system, install during planned downtime.
Ignition 8.3
- Open the Gateway web page and go to Platform > System > Modules.
- Click Install or Upgrade Module +.
- Click Choose File and select the downloaded
.modlfile. - Click Install.
Ignition 8.1
- Open the Gateway web page and go to Config > System > Modules.
- Scroll to the bottom of the module list and click Install or Upgrade a Module.
- Click Choose File and select the downloaded
.modlfile. - Click Install.
If the Gateway asks you to trust the module’s certificate and to accept the licence terms, review and accept them to continue. The module is a third-party module signed by its publisher, not by Inductive Automation.
When the page reloads, OpenBridge for Ignition is in the module list. No Gateway restart is needed.
For more detail, see Inductive Automation’s Installing or Upgrading a Module (also available for 8.1).
Verify
Section titled “Verify”| Where to look | Expected | |
|---|---|---|
| 8.3 | Platform > System > Modules | OpenBridge for Ignition with status Active |
| 2027 | Platform > System > Modules | OpenBridge for Ignition with status Active |
| 8.1 | Config > System > Modules | OpenBridge for Ignition with state Running |
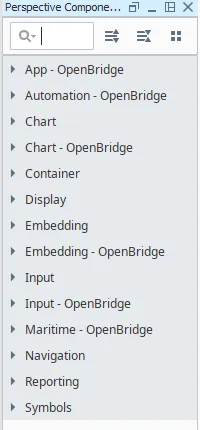
Then restart the Designer and open a Perspective view. The Perspective Components palette, on the right edge of the Designer, has new sections whose names end in - OpenBridge, for example App - OpenBridge and Automation - OpenBridge:
If the module is not running:
| Symptom | Cause | What to do |
|---|---|---|
| Faulted | The .modl is for another Ignition version. |
Install the file that matches your Gateway (2027, 8.3 or 8.1). |
| Listed under Quarantined Modules (8.3) | The Gateway wants the certificate or licence reviewed. | From Ignition 8.3.2, open the three dots menu next to the module and resolve the quarantine reason. |
| Palette sections missing | The Designer was open during the install. | Close and relaunch the Designer. |
Trial Mode and Licensing
Section titled “Trial Mode and Licensing”Without a licence key the module runs in Ignition’s standard trial mode:
- The module runs for two hours at a time. When the time is up, the OpenBridge components stop working in running sessions.
- To continue, log in to the Gateway and click Reset Trial. The trial can be reset any number of times.
- The Gateway web page and the Designer are not affected by the trial timer, so you can keep building.
- Other modules that are already licensed keep running without a time limit.
To remove the time limit, buy a licence from openstudio.no and activate it under Platform > System > Licensing (8.3) or Config > System > Licensing (8.1).
Get the Demo Project
Section titled “Get the Demo Project”The demo project is a complete Perspective project built with the OpenBridge components. It shows how the pieces fit together: a shared top dock with the Top Bar, a navigation menu, and pages for a process overview, card-based layout, alerts, a tank view and connector diagrams.
Added by the Module (Ignition 8.3)
Section titled “Added by the Module (Ignition 8.3)”On an Ignition 8.3 (or 2027) Gateway the module adds the demo project for you. Each
time the module starts (after installing or upgrading it, and at every Gateway
restart) it checks for a project named OpenBridge_template:
- If there is none, the module creates it from the demo project bundled in the module (release v1.2.0) and the project shows up in the project list and the Designer within a few seconds. No restart is needed.
- If it already exists, the module leaves it alone. Your changes to
OpenBridge_templateare never overwritten, also not when you upgrade the module to a version that bundles a newer demo project.
OpenBridge_template is an inheritable project: it is meant as the parent
of your own projects (see Inherit From the Project),
or as a project to duplicate. An inheritable project
cannot be launched in a session by itself; open it in the Designer to study it.
If you delete OpenBridge_template, the module adds it again the next time it
starts. To keep it out of the way, disable it in the project settings
instead of deleting it.
On an Ignition 8.1 Gateway nothing is added: the demo project needs 8.3.
Import the project yourself, as described below, if you want a second copy under another name, a runnable (non-inheritable) copy, or a newer release than the one the module bundles.
Download
Section titled “Download”Download OpenBridge_demo_v1.2.0.zip (release v1.2.0 of the demo project; newer releases are listed on the releases page).
Do not unzip the file. It is a Gateway project export and is imported as it is.
The demo project was made in Ignition 8.3. A project export can only be imported into the same Ignition version or a later one, so it cannot be imported into an 8.1 Gateway.
Import
Section titled “Import”Install the module first. Without it, the OpenBridge components in the project cannot be shown.
Import the zip from the Gateway web page, which creates a new project:
- Go to Platform > System > Projects.
- Click Import Project in the upper right.
- Click Choose File and select the downloaded
.zipfile. - Enter a Project Name, for example
OpenBridge_demo. AvoidOpenBridge_template, the name the module uses. - If a project with that name already exists, Import is disabled until you choose Rename (give the imported project another name) or Overwrite (replace the existing project).
- Click Import.
The project is now in the project list and can be opened in the Designer.
See Inductive Automation’s Project Export and Import for the full description.
After Importing
Section titled “After Importing”A project export contains the project only. Tags and Gateway-level configuration are not included, so check the following:
- Tags. The demo views are bound to tags in the
defaulttag provider (foldersprocessandProject) and in a provider namedSample_Tags. These tags are not part of the zip. Until they exist on your Gateway, the bound values show a quality overlay. The pages, menus and components still render, which is enough to study how the project is built. - Project settings. In the project list, open the three dots menu and choose Edit to set the Default Tag Provider, Default Database and User Source to ones that exist on your Gateway. The project must be closed in the Designer while you change these.
- Enabled. The project is imported enabled. A disabled project can be edited in the Designer but does not run on the Gateway.
- Inheritable. From release v1.2.0 the export is marked Inheritable, so it cannot be launched in a session. To run the demo itself, Edit the project and turn Inheritable off.
These points apply to OpenBridge_template as well.
To see the result, open the project in the Designer as described below, or, once it is not inheritable, launch it in a browser from the Gateway’s Perspective session launcher.
Open the Project in the Designer
Section titled “Open the Project in the Designer”-
Start the Designer from the Designer Launcher and log in with a Gateway user.
-
The Open/Create Project window lists the projects on the Gateway. Click OPEN on the row of the demo project (
OpenBridge_template, or the name you imported it under):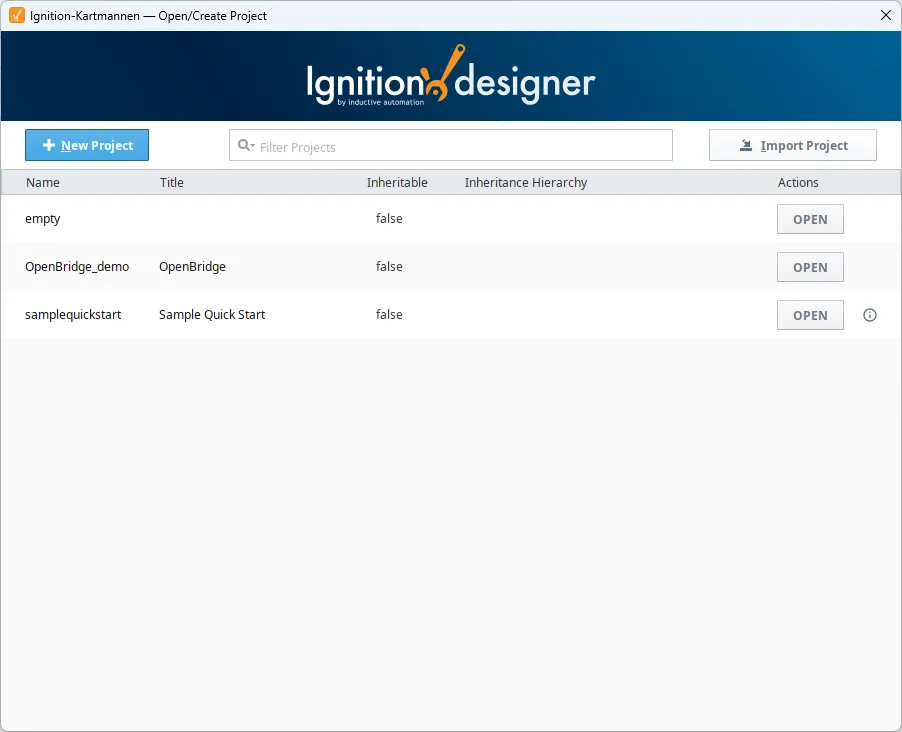
-
The Designer opens on the Perspective home tab. Its Page Configuration shows the demo’s pages (
/,/alerts,/card, …) and the docks shared by all of them: Header, the top dock with the Top Bar, and Menu, the navigation menu on the left: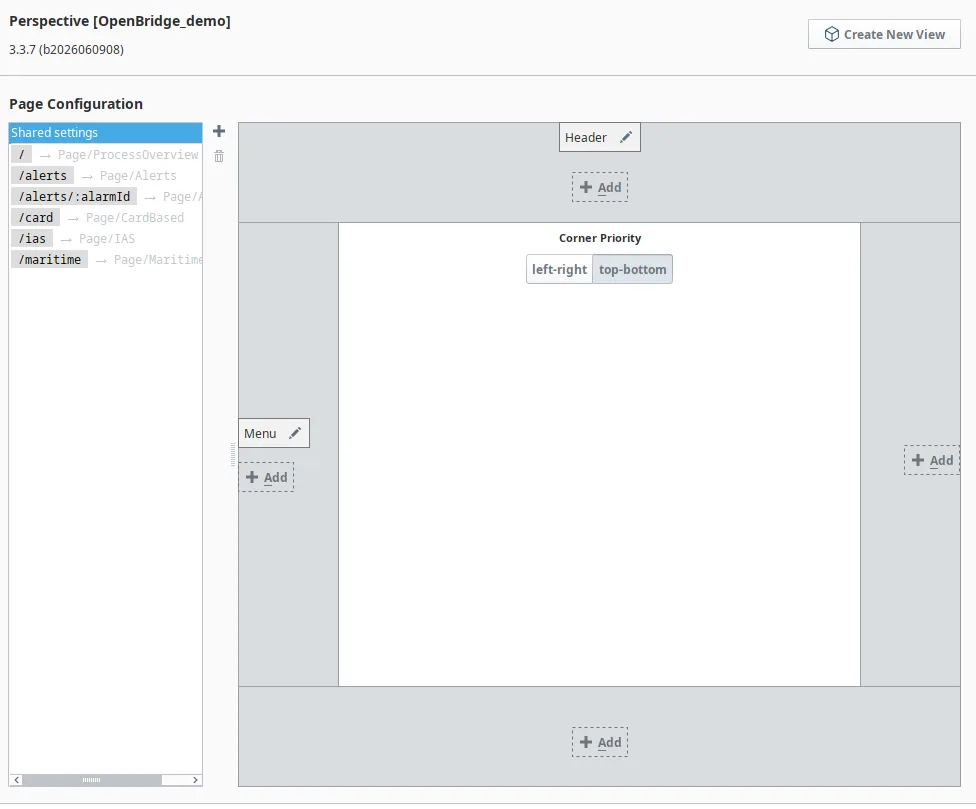
-
In the Project Browser, expand Perspective > Views. The views of the docks are under
Docks, the pages underPage; double-click a view to open it: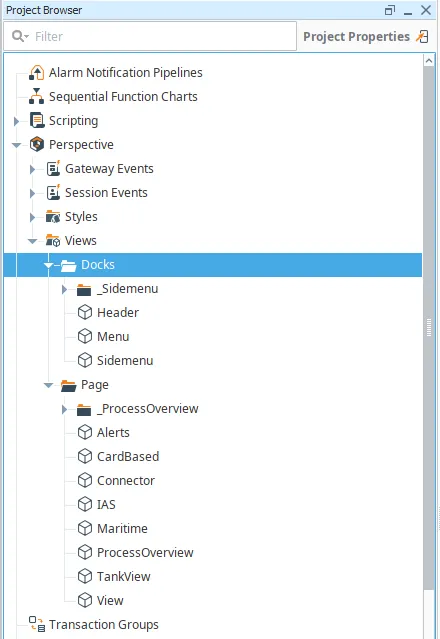
Use the Demo Project as a Template
Section titled “Use the Demo Project as a Template”The demo project is meant to be built on. Starting from it gives you the docks, the Top Bar with its menus, the palette switching, the page routing and the style classes already set up, so you only replace the pages with your own.
There are three ways to do this. If you are unsure, use the first.
| Method | Use it when |
|---|---|
| Import under a new name | You want your own independent project. |
| Duplicate | The demo is already imported and you want a second, independent copy. |
| Inherit | Several projects should share the same docks, menus and styles, and receive updates to them. |
Import Under a New Name
Section titled “Import Under a New Name”Import the zip as described in Import, and enter the name of your own project as the Project Name. The result is an independent project with the demo’s content. Keep the original demo project next to it as a reference.
Choose the name with care: Inductive Automation advises against renaming a project later, because links and shortcuts to it stop working. Change the project’s Title instead if only the displayed name needs to change.
Duplicate the Project
Section titled “Duplicate the Project”If the demo project is already on the Gateway, copy it there:
- Ignition 8.3: go to Platform > System > Projects, open the three dots menu to the right of the project and click Duplicate.
- Ignition 8.1: go to Config > System > Projects, click More to the right of the project and click Copy.
The copy is independent of the original. Changes in one do not affect the other.
Inherit From the Project
Section titled “Inherit From the Project”With project inheritance, a parent project holds the shared resources and each child project adds its own. A change to the parent reaches every child.
- On the Projects page, Edit the project that will be the parent, enable Inheritable, and save.
- Create or Edit the child project, choose the parent in Parent Project, and save.
In the child project the inherited views, styles and page configuration are available at once. To change an inherited resource, right-click it in the Designer and choose Override Resource.
Be aware of the following:
- An inheritable project cannot be launched by itself. The demo project
is already marked Inheritable (from release v1.2.0, and so is
OpenBridge_template), so step 1 is done; it only serves as a parent. Import it a second time under another name, with Inheritable off, if you also want a runnable demo. - An overridden resource no longer receives updates from the parent. Choose Discard Overrides to go back to the parent’s version.
- A Gateway export of a child project contains only the child’s own resources, not the inherited ones.
See Inductive Automation’s Project Inheritance for details.
Make It Your Own
Section titled “Make It Your Own”After creating your project from the demo:
- Set the project Title in the project settings.
- In the top dock view (
Docks/Header), set the Top Bar’sappName, and adapt the navigation menu to your pages. - Replace the demo pages under
Page/with your own views, and update the page URLs in the Perspective Page Configuration. - Point the bindings to your own tags.
- Keep the style classes and the shared docks. They are what keeps the project consistent with the OpenBridge design system across all palettes. See Use the Demo Styles.
Use the Demo Styles
Section titled “Use the Demo Styles”The OpenBridge components follow the palette by themselves. Ignition’s own components — a Label, a container, a Flex Repeater — do not: their text and backgrounds keep Ignition’s colours whatever palette the operator picks. The demo project’s style classes close that gap. Give a standard component the right classes, and it takes the OpenBridge fonts and colours, and changes with the palette like the rest of the page.
The Style Classes
Section titled “The Style Classes”The classes are in the Project Browser under Perspective > Styles:
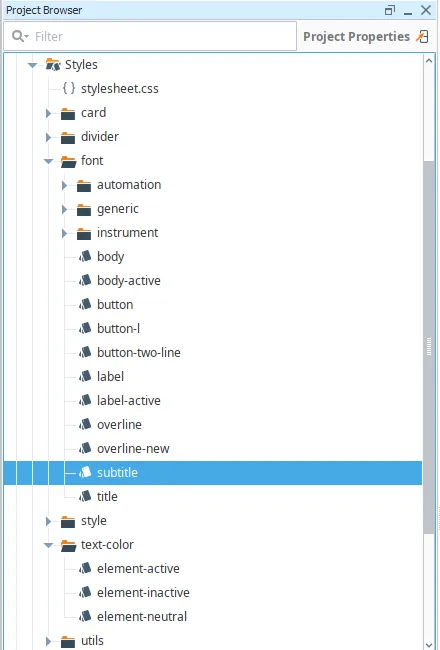
| Folder | Use it for |
|---|---|
font/ |
OpenBridge typography: body, label, subtitle, title, overline, button and more. font/automation/, font/instrument/ and font/generic/ hold the specialised sizes. |
text-color/ |
Text colour: element-neutral (ordinary text), element-active (selected, highlighted) and element-inactive (disabled, secondary). |
card/ |
card/card: a container drawn as an OpenBridge card, with background, outline and rounded corners. |
divider/ |
A divider line on one side of a component (top, bottom, left). |
utils/ |
Spacing (p-8, p-16) and overflow-visible. |
A font class sets only the font, a text-color class only the colour, so a
text normally gets one of each. The classes use the OpenBridge colour and size
variables (for example --element-neutral-color) rather than fixed values;
that is what makes them follow the palette.
stylesheet.css, at the top of the folder, holds a few rules that are not
style classes, for example the background of every view.
Example: a Label in the OpenBridge Style
Section titled “Example: a Label in the OpenBridge Style”-
Drop a standard Label (Display section of the palette) into a view, and set its
text, hereFuel tank. -
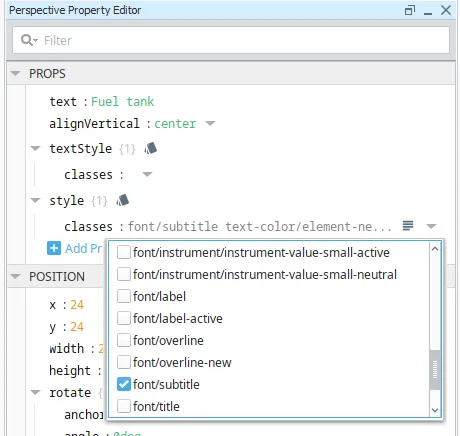
In the Property Editor, open the drop-down at the end of props > style > classes. It lists every style class of the project; tick font/subtitle and text-color/element-neutral:
You can also type the classes, separated by a space:
font/subtitle text-color/element-neutral.
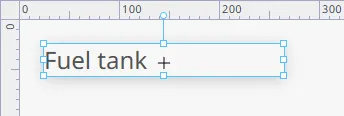
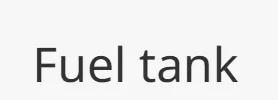
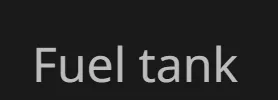
The Label now uses the OpenBridge subtitle font and the neutral text colour. On the Designer canvas it shows the Day colours:
In a session, the colour follows the palette the operator picks in the
Top Bar. The Top Bar applies the palette to the
whole page, and text-color/element-neutral resolves to that palette’s neutral
text colour, so the Label changes together with the Top Bar and the OpenBridge
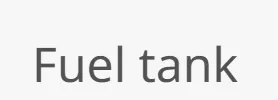
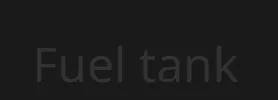
components. Next to it, the same Label with only font/subtitle and no colour
class:
| Palette | Top Bar | font/subtitle text-color/element-neutral |
font/subtitle only |
|---|---|---|---|
| Day |  |
 |
 |
| Dusk |  |
 |
 |
| Night |  |
 |
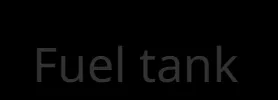 |
Without the colour class, the text keeps Ignition’s dark grey: readable in Day, but almost invisible in Dusk and Night.
Use the Styles in Another Project
Section titled “Use the Styles in Another Project”The style classes belong to the demo project. A project made from the demo (imported under a new name, duplicated or inheriting from it) has them already. To use them in an existing project, copy the Styles folder over: right-click it in the demo’s Project Browser and choose Export, then File > Import the file in your own project. Keep the class names, since components refer to classes by name.
Related
Section titled “Related”- OpenBridge Design System — the design guideline the components implement.
- Support: contact@openstudio.no
Found an error or something unclear?
Tell us what is wrong, confusing or missing on this page.
Built on the OpenBridge Design System